
Free Crochet Patterns
See our Copyright Policy regarding NexStitch™ Articles
Will That Be a Single or a Double? Basic Crochet Stitches 101|
When you see a crochet pattern filled with crochet terms and jargon, chances are it's made from a combination of the 'usual suspects': single, half double, double, treble, and double treble crochet stitches. These stitches are, for all intents and purposes, dubbed the 'siblings' of 'The Crochet Family.' They're related like brothers and sisters in that each is a little bigger than the next and has certain capabilities that the others don't have. The baby of this family is called the, 'Single Crochet.'
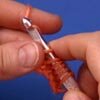
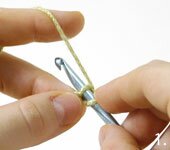
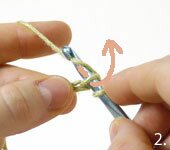
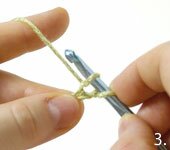
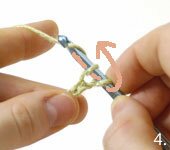
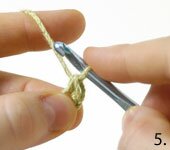
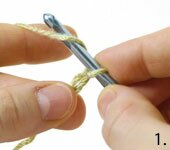
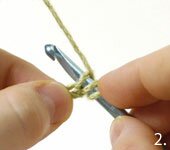
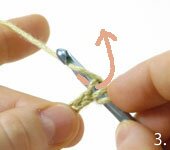
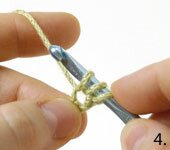
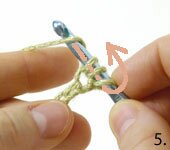
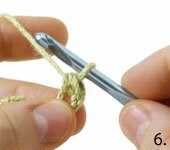
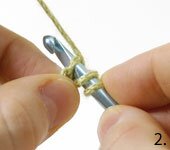
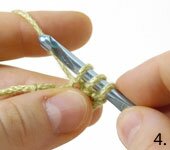
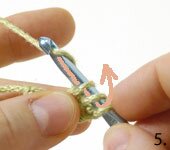
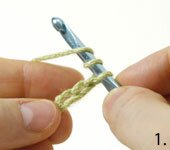
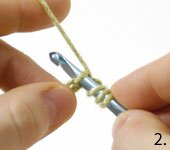
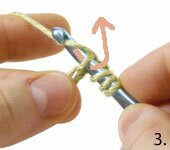
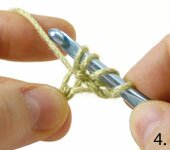
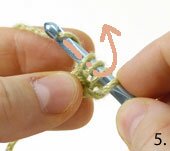
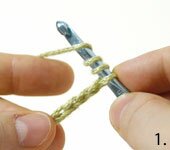
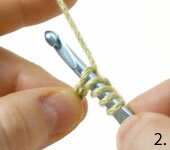
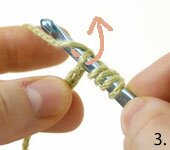
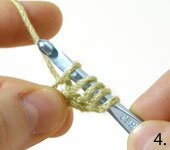
To make a Single Crochet Stitch (SC), insert the hook in the next chain (1), wrap the yarn from back to front over the hook (2), pull the first loop through the second one (3), wrap the yarn from back to front over the hook again (4), and pull through the last two loops on the hook (5). |
||
 |
 |
 |
 |
 |
|
|
The next biggest stitch in the 'family' is called the Half Double Crochet Stitch (HDC).
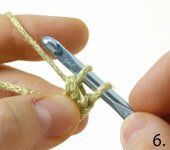
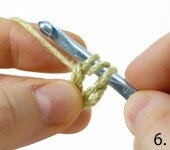
To begin, wrap the yarn from back to front over the hook (1), insert the hook in the next chain (2), wrap the yarn from back to front over the hook (3), pull the first loop through the second one (4), wrap the yarn from back to front over the hook again (4), and pull through the last three loops on the hook (6). |
||
 |
 |
 |
 |
 |
 |
|
'Big brother' to the HDC is the Double Crochet, dubbed DC. It's about twice as big as an SC and is used to create more complex stitches such as the fan, shell, or bobble stitches.
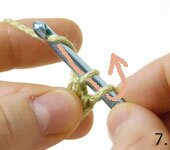
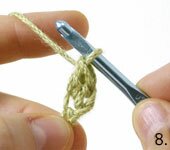
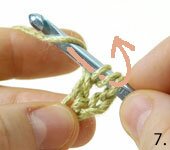
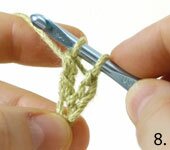
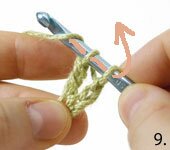
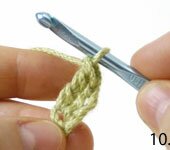
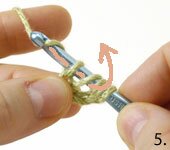
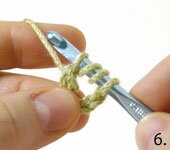
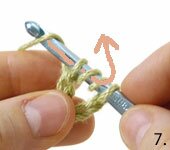
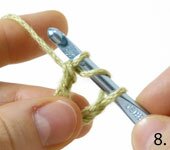
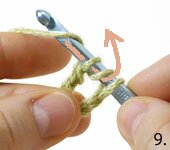
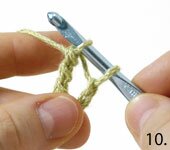
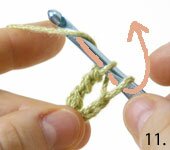
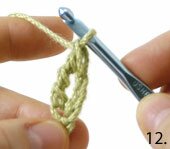
To begin, wrap the yarn from back to front over the hook (1), insert the hook in the next chain (2), wrap the yarn from back to front over the hook (3), pull the first loop through the second one (4), wrap the yarn from back to front over the hook again (5), pull the first loop through next two loops (6), wrap the yarn from back to front over the hook (7) and pull through the last two loops on the hook (8). |
||
 |
 |
 |
 |
 |
 |
 |
 |
|
|
Towering over the DC is the Treble Crochet, nicknamed TR. This stitch is also used to create more complex stitches such as the fan, shell, or bobble stitches, except they are larger than their younger counterparts.
To start, wrap the yarn from back to front over the hook two times (1), insert the hook in the next chain (2), wrap the yarn from back to front over the hook (3), pull the first loop through the second one (4), wrap the yarn from back to front over the hook again (5), pull the first loop through next two loops (6), wrap the yarn from back to front over the hook (7), pull through the next two loops on the hook (8), wrap the yarn from back to front over the hook (9), pull through the last two loops on the hook (10). |
||
 |
 |
 |
 |
 |
 |
 |
 |
 |
 |
||
|
The biggest stitch in this family line is the Double Treble Crochet Stitch. DTR's are not commonly found in patterns, but it's a good idea to at least know of their existance in case you wind up coming across this 'older sibling' in a pattern.
To begin, wrap the yarn from back to front over the hook three times (1), insert the hook in the next chain (2), wrap the yarn from back to front over the hook (3), pull the first loop through the second one (4), wrap the yarn from back to front over the hook again (5), pull the first loop through next two loops (6), wrap the yarn from back to front over the hook (7), pull through the next two loops on the hook (8), wrap the yarn from back to front over the hook (9), pull through the last two loops on the hook (10) wrap the yarn from back to front over the hook (11), and pull through the last two loops on the hook (12). |
||
 |
 |
 |
 |
 |
 |
 |
 |
 |
 |
 |
 |
| Practice all of the above stitches until you feel like you are able to create consistently sized stitches over and over again. Once you're capable of doing that, practice making squares using one stitch throughout. To do this, you'll need to have a better understanding of how to turn your work and begin a new row. | ||
<< Return to Articles Main Page >>
mailing list
site map